Ok, I'll share my experience, but you have to evaluate what you take from it, as others may chime in later indicating they followed the directions exactly without issues. I did three things differently from the SB instructions on my aircraft and a friend's, and I've got a second 12iS friend that is in the process of doing the same...
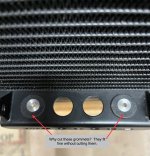
- First, the rubber grommets insert into the radiator just fine without cutting and adding RTV, so we eliminated that step. Not sure the intent here.
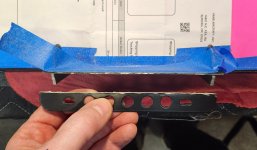
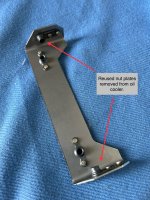
- We did not install rivets in the holes left from the nut plate removed from the oil cooler. Not sure of the value of this step, but if they had been installed, it's difficult to see how they wouldn't have interfered with the new mounting bracket.
- Lastly, we did not use the provided nuts to secure the sides of the new bracket to the oil cooler. We installed the nut plates that were removed from the oil cooler on the new mounting bracket. Van's already had the bracket punched to accommodate these nut plates (you can see the unused holes in the SB photos too), but chose not to use them for some reason. It is difficult to understand how one would have been able to have reached behind the radiator with a wrench to tighten the nut & bolt after mounting, as the space is very tight. And if tightened prior to installing the radiator, not sure the angle would have been correctly aligned to insert the bolts on the bottom of the bracket/radiator.
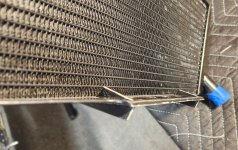
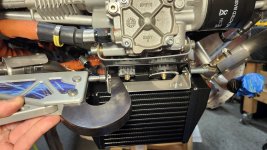
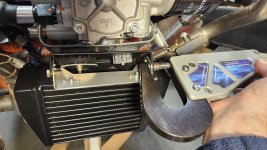
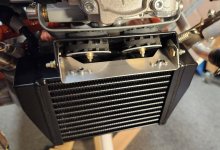
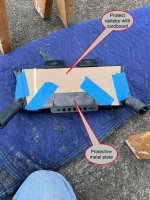
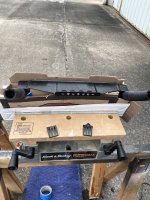
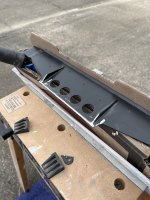
Here are few photos I took during my fabrication. Sorry, but none of the installation. To remove the brackets, we used an angle grinder with a cutoff wheel and deburred with a drum sander on a rotary tool (Dremel). You can see we took precautions to avoid damaging the radiator by using cardboard and a metal plate.
Again, take what you want from my experiences. Share if you ended up doing anything differently.


 www.vansaircraft.com
 . Thanks for the clarification others can follow.
")