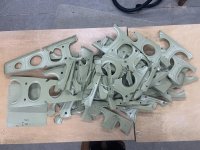
Hello all. I want to share my thoughts regarding the disassembly of my RV10 wings due to LCP. All of my spar box ribs, leading edge ribs, flap attach ribs, and torque tube bearing mount were all LC, so a complete wing disassembly was in order.
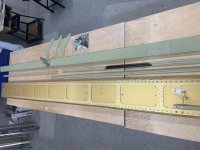
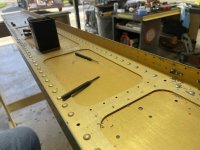
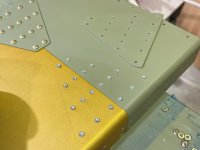
No too much to talk about in regards to drilling rivets. Just use the time tested methods and take your time. I choose to focus on protecting the main spars at all costs, as that’s all I was really trying to salvage for rebuild. Everything except the skins came out undamaged, so I actually did better than I was hoping. Drilling out thousands of -3 rivets, there was bound to be some rivet holes mucked up.
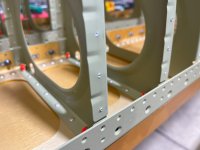
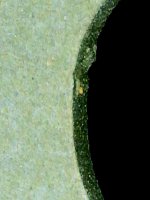
In the end, I don’t think disassembly of major components like a wing to remove affected LCPs is reasonable. Every one of my main ribs and leading edge ribs looked good upon inspection of the completed assembly. Fact of the matter is, upon removal for unobstructed inspection, every rib was cracked in almost every rivet hole.
I just can’t allow these parts in the air.
No too much to talk about in regards to drilling rivets. Just use the time tested methods and take your time. I choose to focus on protecting the main spars at all costs, as that’s all I was really trying to salvage for rebuild. Everything except the skins came out undamaged, so I actually did better than I was hoping. Drilling out thousands of -3 rivets, there was bound to be some rivet holes mucked up.
In the end, I don’t think disassembly of major components like a wing to remove affected LCPs is reasonable. Every one of my main ribs and leading edge ribs looked good upon inspection of the completed assembly. Fact of the matter is, upon removal for unobstructed inspection, every rib was cracked in almost every rivet hole.
I just can’t allow these parts in the air.